对于您网站需要的每种类型的內容,您需要经过三个步骤进行开发
- 创建自定义內容类型并配置其字段
- 设置您的应用程序以从 API 检索该內容
- 将內容加载到您的页面模板中
让我们更详细地了解每个步骤,我将介绍如何使用主页和文章页面设置一个简单的新闻文章网站 (演示网站).
1) 文章页面
创建文章自定义內容类型
开发自定义內容类型时,您需要确定所需的所有內容字段。例如,博客文章可能是文本、图像和块引用的一种组合。对于产品,您需要定义图像字段、数字字段和特定于产品页面设计的文本字段。
对于我们的文章页面,我们需要一个 UID(用于 SEO 友好 URL 的唯一 ID)、发布日期、标题、主图像、作者以及三个不同的可重复部分,这些部分可以混合搭配:文本、引用和图像。
实际构建自定义类型的流程因 CMS 而异,但最终我们将获得一个自定义类型,该类型具有所有我们需要的字段,以便用內容填充。以下是我们的文章自定义类型的样子

我用于此示例的 CMS 是 prismic.io,尽管任何输出 JSON 的 CMS 都可以在这里进行调整以供使用。例如,CSS-Tricks 有许多关于 WordPress JSON API 的文章,并且似乎 Perch Runway 3 将具有“无头 CMS”功能。Prismic 还使用 JSON 来构建您的自定义类型并配置您的內容字段。我将用于此项目的自定义类型的 JSON 代码包含在 GitHub 上的项目包中。您可以在 `customTypes` 文件夹中找到它们。
创建和配置文章自定义类型后,您将创建一些文章,接下来我们将了解如何查询 API 以检索它们。
设置前端应用程序以查询 API 并加载文章
这就是基于 API 的 CMS 真正闪耀的地方。您可以根据自己的意愿构建您的网站,使用您喜欢的任何技术。许多现有的基于 API 的 CMS 为主要技术提供了特定的开发套件,这些套件提供了查询 API 和解析返回数据的所需所有方法。这使得轻松引导您的项目变得容易。
无论您使用什么代码,您都需要查询 API 以检索要显示的內容。我使用 prismic.io 的 NodeJS 开发套件 构建了此示例网站。我选择 NodeJS,因为它是一个简单易用的 JavaScript 服务器端平台。
让我们设置我们的应用程序以通过它们的 UID 加载页面。以下是用代码查询 API 以获取我們的內容页面的示例。
app.route('/:uid').get(function(req, res) {
  var uid = req.params.uid;
  api(req, res).then(function(api) {
    // Here we are querying for a custom type ‘article’ by its unique ID
    return api.getByUID('article', uid);
  }).then(function(pageContent) {
    res.render('article', {
      pageContent: pageContent
    });
  });
});
将內容加载到页面模板中
从 API 收集完所需的內容后,剩下的就是将內容加载到我们的模板中。我们对 API 的查询将返回一个 JSON 对象,其中包含所有我们的內容。
开发套件还将附带辅助函数,使将內容加载到我们的模板中变得简单易行。
此示例网站使用 Pug(以前称为 Jade)模板系统来创建页面的 html。整合页面內容既快捷又容易。我们只需要用从 API 查询的內容替换静态內容即可。
下面我包含将內容整合到模板中的代码,但不包括标头或布局文件之类的部分。如果您想查看这些部分,请随时查看 GitHub 上的完整项目。
extends ./layout.pug

block body
  include ./partials/header.pug

  div.article.container
    include ./partials/back.pug

    h1
      //- Here we insert the StructuredText field ‘title’ from the custom type ‘article’
      != pageContent.getStructuredText('article.title').asText() || 'Untitled'
    img.article-image(src=pageContent.getImage('article.image').url, class='star')

    - var sliceZone = pageContent.getSliceZone('article.body') || {}
    for slice in sliceZone.slices
      //- Render the right markup for a given slice type.
      case slice.sliceType

        // Text Section
        when 'text'
          div.article-section.text
            != slice.value.asHtml()

        // Quote Section
        when 'quote'
          div.article-section.quote
            span.block-quotation !{slice.value.asText()}

        // Image Section
        when 'image-with-caption'
          - var imageWithCaption = slice.value.toArray()[0]
          - var imageUrl = imageWithCaption.getImage('illustration') ? imageWithCaption.getImage('illustration').url : ''
          - var caption = imageWithCaption.get('caption')
          div.article-section.image
            img(src=imageUrl)
            if caption
              p
                span.image-label !{caption.asText()}

    include ./partials/back.pug
现在,我们已成功地显示了网站的页面!我们将快速完成相同的流程以设置我们的主页。
2) 主页和布局
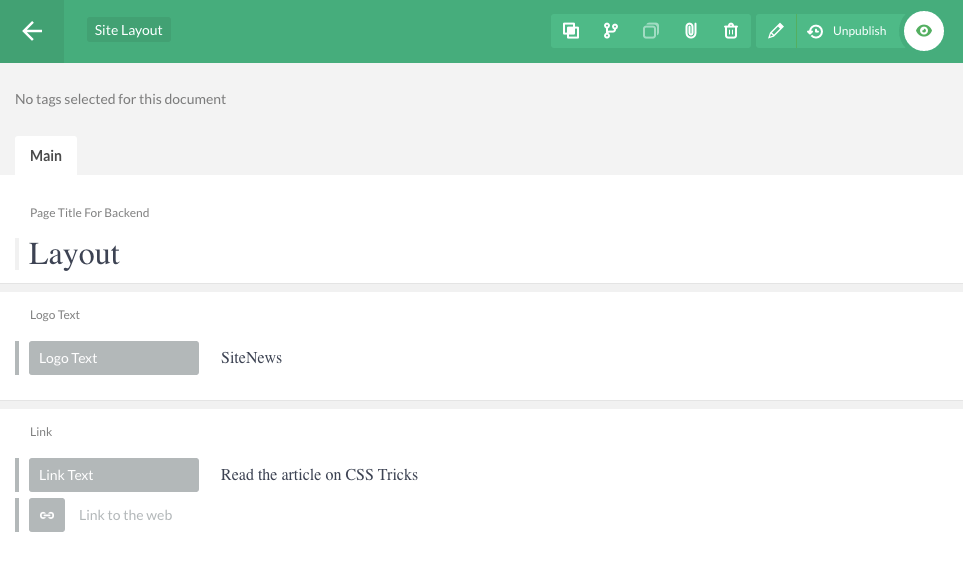
创建布局自定义內容类型
我们需要一个自定义类型来处理网站的布局。这将包括徽标的文本、此文章的链接以及该链接的文本。主页本身将由所有文章的內容组成,因此我们无需为其创建自定义类型。
查询 API 并加载主页
要获取主页所需的所有內容,实际上需要查询 API 两次。一次是获取布局內容,另一次是显示主页上所有文章的磁贴。以下是用 NodeJS 实现的方法。
// Route for homepage
app.route('/').get(function(req, res) {
  api(req, res).then(function(api) {
    // Query the site-layout content
    api.getSingle("site-layout").then(function(layout) {
      // Then query all the articles and sort by date
      api.query(
        prismic.Predicates.at("document.type", "article"),
        { orderings: '[my.article.date desc]' }
      ).then(function(articles) {
        res.render('homepage', {
          layout: layout,
          articles: articles.results
        });
      }).catch(function(err) {
        handleError(err, req, res);
      });
    }).catch(function(err) {
      handleError(err, req, res);
    });
  });
});
将內容加载到主页模板中
然后,将布局和文章內容加载到主页模板中就是一个简单的步骤。要添加布局內容,只需更新 header.pug 文件即可。
header
  a(href="./")
    p.logo
      != layout.getText('site-layout.logo')
  a.article-link(href=layout.getLink('site-layout.link').url() target="_blank")
    != layout.getText('site-layout.link-text')
在主页上,我们将最新的文章放在顶部。因此,我们获取第一篇文章并将其加载到此模板中
div.featured-article-container
  div.featured-article(style="background-image: url(" + article.getImageView("article.image", "featured").url + ");")
    div.featured-content
      h2
        != article.getStructuredText('article.title').asText() || 'Untitled'

      //- display first valid slice text and limit it respecting the end of words.
      - var firstParagraph = article.getFirstParagraph()
      - var firstParagraphInPost = firstParagraph ? firstParagraph.text : ''
      - var textLimit = 100
      - var limitedText = firstParagraphInPost.substr(0, textLimit)
      p.description
        if firstParagraphInPost.length > textLimit
          = limitedText.substr(0, limitedText.lastIndexOf(' ')) + '...'
        else
          = firstParagraphInPost
      a.button.featured-button(href=ctx.linkResolver(article)) Read the article
然后,您需要做的就是整合其余的文章。
div.article-tile
  div.article-tile-image(style="background-image: url(" + article.getImageView('article.image', 'tile').url + ");")
  img.article-tile-mobile-image(src=article.getImageView('article.image', 'tile-mobile').url)
  div.article-tile-content
    h2
      != article.getStructuredText('article.title').asText() || 'Untitled'
    p.meta-info
      != article.getText('article.author')
      span.date  -
        != ctx.dateConverter(article.getTimestamp('article.date'))
    //- display first valid slice text and limit it respecting the end of words.
    - var firstParagraph = article.getFirstParagraph()
    - var firstParagraphInPost = firstParagraph ? firstParagraph.text : ''
    - var textLimit = 300
    - var limitedText = firstParagraphInPost.substr(0, textLimit)
    p.description
      if firstParagraphInPost.length > textLimit
        = limitedText.substr(0, limitedText.lastIndexOf(' ')) + '...'
      else
        = firstParagraphInPost
    a.button(href=ctx.linkResolver(article)) Read the article
整合完成后,我们的网站便可以从 API 中拉取內容并显示了!
3) 其他用途
使用基于 API 的 CMS 的另一个好处是,您可以在其他格式(如手机应用程序)中查询和加载內容。为了说明这一点,我还创建了一个 iOS 应用程序,它查询相同的 API 并将新闻文章显示在您的智能手机上。
我使用 React Native 构建了应用程序,并遵循了上述相同流程。我选择 React Native,因为它允许您仅使用 JavaScript 创建丰富的移动 UI。虽然我只构建了 iOS 应用程序,但 React Native 也使您能够轻松地在 Android 上运行您的应用程序。
自定义类型已经到位后,您可以开始查询 API。我在下面提供了一些示例代码,但请随时在 我的 GitHub 存储库中 探索整个项目。以下是获取文章內容的查询。
// The query for the article
async function article (uid) {
  try {
    const api = await PrismicHelper.getApi()
    const layoutDoc = await api.getSingle('site-layout')
    const articleDoc = await api.getByUID("article", uid)
    return {layoutDoc, articleDoc}
  } catch(error) {
    console.log(error);
    return {};
  }
}
查询完內容后,您可以使用与我们在 NodeJS 网站中使用相同的方法在视图中显示內容。同样,以下是用代码显示其外观的示例。
<ScrollView>
<StatusBar
hidden
/>
<View style={styles.container}>
<Text style={styles.logo}>
{layoutDoc.getText('site-layout.logo')}
</Text>
<TouchableHighlight onPress={ () => this._navigate() } underlayColor='rgba(0,0,0,0)'>
<Text style={styles.back}>← back to list</Text>
</TouchableHighlight>
<Text style={styles.title}>
{article.getStructuredText('article.title').asText()}
</Text>
<Image source={{uri: article.getImage('article.image').url}} style={[styles.mainImage, styles.section]} resizeMode="cover"/>
{ !content ?
<Text>Content is missing, try again later</Text>
:
<View style={styles.contentWrapper}>
{content}
<TouchableHighlight onPress={ () => this._navigate() } underlayColor='rgba(0,0,0,0)'>
<Text style={styles.back}>← back to list</Text>
</TouchableHighlight>
</View>
}
</View>
</ScrollView>将手机应用程序与网站分开创建的好处是,您可以更好地与受众建立联系,并使他们更容易通过手机访问您的内容。您甚至可以更上一层楼,在每次发布新文章时发送推送通知,真正让您的受众保持最新状态。我发现使用 Urban Airship 集成通知非常容易。
我希望这篇文章能很好地说明基于 API 的 CMS 方法的预期内容。我喜欢基于 API 的 CMS 提供的自由和控制级别。首先,您可以根据自己的需要设置内容类型。然后能够使用最适合您和您的项目的技术和模板系统。最后,连接到 API 以轻松将您的内容集成到您的模板中。
我喜欢这篇文章,但恕我直言,它遗漏了一个重要的点:网站应该以与移动应用程序完全相同的方式构建,通过直接查询 CMS 来构建,而不是通过让服务器充当查询 CMS 的代理。
无论是 Node.js 还是其他任何东西,涉及服务器环境都会破坏您从直接查询 CMS 获得的开箱即用的可扩展性和灵活性。我建议将静态前端(HTML、CSS 和 JS)托管在云中某个地方(例如,使用 CloudFront 进行交付的 S3 用于存储),这将为您提供完全自动化的免维护可扩展性。让 CDN 负责交付前端,让 CMS 负责交付后端。
(当然,下一个问题是,我们如何处理搜索引擎和其他爬虫?好吧,我们要么使用同构 JS 环境在服务器上模拟前端,专门用于爬虫,要么我们自己爬取我们的网站,并将内容静态地提供给爬虫。无论如何,这是一篇完整的文章。)
与我的上一个评论无关 - 如果你确实使用 NodeJS,并且没有像 React 示例那样使用 ES2017,你仍然可以通过链接 Promise 来避免所有这些嵌套和重复。
我真的很喜欢这种方法。我喜欢更进一步,构建一个完全静态的前端,在开发过程中,我会在构建时从 CMS 获取数据,并将其存储在 JSON/YAML 文件中,然后使用这些数据来呈现 Pug 模板。
这样,当请求页面时,获取数据的延迟实际上不存在 - 内容已经编译成 HTML 并立即提供。
Prismic.io/Contentful 在这方面很棒 - 但您甚至可以考虑使用 Airtable 或优秀的、仍处于 Alpha 阶段的 Dato CMS 等服务,它们提供脚本将内容呈现为静态数据文件。
当然,每当 CMS 上的内容发生更改时,您都需要重新编译网站 - 但 Netlify 或 Now 等托管 CDN 服务允许通过 Webhook/Zapier 等解决方案自动执行此过程。
构建 100% 预编译的网站,这些网站可以在任何 CDN 上运行,并且拥有非技术客户友好的管理区域,这是一种美妙的感觉!传播 JAM :)
您好,您认为是否可以使用这种方法与 AngularJS?一个人必须以某种方式将其打印到模板中,通过 PHP,以便它发生在服务器端而不是客户端端?
我能想到的基于 API 的 CMS 的唯一缺点是,如果开发人员将 CMS 托管在网站外,并且只使用 JS 将数据 AJAX 到他的页面,那么如果其中一个崩溃,你就不会托管任何内容,因此你需要一个非常好的故障安全措施,比如在客户端服务器上缓存它。
没错,但如果你没有基于 API 的 CMS 并且它崩溃了,也会发生同样的事情;) 在任何情况下,你都必须规划可扩展性和可用性,除了无头 CMS 场景更容易扩展。
我最近使用 Prismic 和 react 构建了一个网站,使用这两种技术都很愉快,向客户解释 CMS 方面的内容只需要几分钟。
不过,让我害怕的一件事是,如果 Prismic(或您正在使用的服务)倒闭。
适用于 SPA 或 RIA,但对于“普通”网站来说是一种糟糕的方法。它会损害性能和用户体验。
https://adactio.com/journal/11512
除了对机器人和 SEO 的困难之外。
感谢这篇文章……不过当我尝试阅读那些 Pug 模板时,我迷路了。
我使用过 Prismic,只能说我对产品和背后的团队只有积极的评价。易于使用,漂亮的 UI,支持人员的快速响应,最重要的是,您可以在任何时候呈现 JSON,甚至可以呈现疯狂的东西,例如使用 WebGL 的 3D 等等。